Featured Gear
Okuma X-99 Float Fishing Rod
8.5 to 10.5 foot float fishing rod with 6 to 12 pound line rating, used for slide float fishing
"my favorite is like this okuma x 99 this is an awesome rod six to twelve pound line rating"
The Complete Guide to Float Fishing for Steelhead: Sliding and Fixed Setups Explained
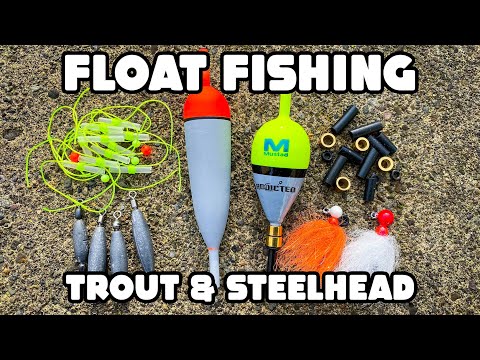
There's a particular kind of satisfaction that comes with watching a float disappear beneath the surface of a river — that sudden, unmistakable signal that something wild and powerful has taken your offering. Float fishing for steelhead is one of the most exciting and accessible methods available to anglers of all experience levels, yet surprisingly few comprehensive guides exist to walk beginners through the process from start to finish. Marlon and Jordan from Addicted Fishing set out to change that on a characteristically wet Pacific Northwest day, breaking down both the sliding float and fixed float methods in detail. Whether you're a seasoned river angler looking to refine your technique or a newcomer holding a rod for the first time, what follows is everything you need to get started — and get productive — on steelhead water.
Choosing the Right Rod: The Foundation of Effective Float Fishing
Before a single piece of terminal tackle is rigged, the conversation has to start with the rod. Float fishing demands a longer blank than most beginners expect, and that length serves a critical functional purpose: line management. Without the ability to control your line on the water, even the most perfectly assembled rig will underperform.
Jordan recommends starting with nothing shorter than eight and a half feet, with a preference for rods in the nine-and-a-half to ten-and-a-half foot range. His personal go-to is the Okuma Celilo X, a rod with a six- to twelve-pound line rating that pairs well with a 3000-series reel loaded with fifty-pound braid.
"Any rod will work for this, as long as it's a little bit longer — and that'll go into how we manage our line, which you'll see here in just a minute."
Marlon echoes the sentiment, adding that longer is almost always better when it comes to float fishing. A longer rod gives you the reach needed to lift line off the water, execute clean mends, and keep your presentation tracking naturally through a drift. If you're just getting into float fishing and trying to decide what to buy, both anglers agree: invest in the longest rod within your budget and you'll thank yourself on the water.
As for line, both anglers favor heavy braided line — forty to fifty pound or higher — for the main setup. The reason is counterintuitive to many newcomers: braid floats. By keeping your main line on the surface, you're better positioned to manage slack, execute mends, and read your drift. In that sense, as Jordan points out, float fishing with braid shares more DNA with fly fishing than most people realize.
Mentioned in This Article
Okuma 3000 Series Spinning Reel
3000 series spinning reel by Okuma, paired with braided line for float fishing
The Sliding Float Setup: Versatility for Deep, Fast Water
The sliding float setup is the method of choice when you're confronting deep runs, fast current, or any scenario where depth needs to be dialed in with precision. Unlike its fixed counterpart, the sliding float moves freely along the main line between a bobber stop and the weight below it, allowing you to fish at virtually any depth without being constrained by the length of your leader.
Building the Rig Step by Step
Jordan walks through the setup methodically. The foundation of the sliding float rig is the bobber stop — a small piece of rubber or thread that cinches onto the main line and determines how deep your presentation will run. Rubber stops are slightly preferable to thread stops for their durability and ease of adjustment, but both get the job done.
Above the float, Jordan recommends threading on at least two small beads — or even a small corky in place of one — before sliding on the float itself. This serves a dual purpose: the bead prevents the float from riding over the bobber stop, and it gives you a visual reference point when the rig hits the water, letting you confirm that the line has run through cleanly without tangling.
Below the float, a third bead protects the knot from wear caused by the inline weight sliding against it. The weight itself — Jordan typically uses an inline float weight, though a barrel swivel with four or five split shots works equally well in a pinch — connects directly to the main braid via a clinch knot. From there, a fluorocarbon leader of three and a half to four feet extends down to the terminal presentation.
"I'll do a normal barrel swivel and put four or five split shots — whatever amount of weight I need — and that will help slide that down and get you that perfect amount of weight for cheap, or again in a pinch."
For low, clear water conditions where the high-visibility braid might spook fish, Jordan suggests adding a mono or fluorocarbon bumper between the braid and the rest of the rig. This small addition can make a meaningful difference in pressured or gin-clear rivers where steelhead have had time to become leader-shy.
Choosing a Presentation
Jordan's preferred terminal setup for steelhead under the sliding float is an eighth-ounce jig head — in this case, an Addicted worm head — paired with a four-inch soft plastic worm. The worm's subtle, natural movement in the current is a proven steelhead trigger, and the relatively light jig weight allows the bait to respond freely to water movement rather than hanging stiff and lifeless.
That said, the sliding float setup is not locked to any particular presentation. Jigs, worms, beads, and cured bait all work effectively under a sliding float. The method is the chassis; the presentation is the engine, and both can be swapped depending on conditions and fish behavior.
The Fixed Float Setup: Simplicity and Sensitivity in Smaller Water
Where the sliding float excels in heavy flows and deeper runs, the fixed float is the undisputed champion of smaller water. Fixed to the main line rather than free-sliding, this setup delivers unmatched sensitivity and direct communication between angler and presentation — every twitch of the rod is transmitted immediately to the bait below.
"A fixed float is going to prevail on every other scenario. It is going to be the preferred method on small creeks, on small streams, or even big rivers that might have low flow or low water at the time."
Marlon is unambiguous in his enthusiasm for the fixed float, calling it the preferred setup for the vast majority of river scenarios most anglers will encounter. The exception is high, fast water on large rivers — conditions where the sliding setup's depth adjustability gives it the edge.
Material Matters: Why Balsa Beats Foam
Not all fixed floats are created equal, and Marlon is emphatic on one point: choose balsa over foam whenever possible. The physics are straightforward — balsa wood offers more neutral buoyancy than foam, making it significantly more sensitive to subtle takes and bottom contact. A foam float will mask the kind of gentle dips and tilts that a good balsa float communicates clearly.
The Mustad Addicted fixed float that Marlon uses takes this a step further with a built-in weight system at the base of the float. By adding or removing small weights from the stem, anglers can fine-tune the float's buoyancy to match the weight of their presentation precisely. A properly balanced float — one that sits low in the water with minimal freeboard — is far more sensitive than one that rides too high.
Rigging the Fixed Float
The fixed float rig begins where the sliding setup ends: with a connection between the main braided line and a fluorocarbon leader. A double uni knot is Marlon's preferred connection, though blood knots and the Alberto knot are equally valid options. The key is finding a knot you can tie reliably under cold, wet conditions and committing it to muscle memory.
From that braid-to-fluoro connection, Marlon pulls off eight to ten feet of fluorocarbon leader — adjustable based on the depth of the water being fished. The float itself attaches to this leader via two pieces of surgical tubing: one at the top stem and one at the bottom. This attachment method is what gives the fixed float its name, but it also allows for quick depth adjustments on the fly. Sliding the float up the leader deepens the presentation; sliding it down shallows it up. No bobber stops, no beads, no additional hardware required.
"The reason I love a fixed float setup is because of the simplicity of it," Marlon explains. "You have your rod, your reel, your braided line, your fluorocarbon to your fixed float, to what you're going to fish — and that's it."
Presentation Selection for the Fixed Float
On the day of filming, with the river running high and slightly off-color from recent rainfall, Marlon opts for a quarter-ounce hot pink ball head jig paired with a chrome candy soft plastic worm — a translucent pearl-white and pink bait that he trims from six inches down to four. In cleaner, lower water, he'd likely drop to an eighth-ounce jig head and a smaller profile worm, allowing the bait to move more freely and naturally.
The worm-trimming technique is worth emphasizing for anglers who haven't tried it. A six-inch worm is a versatile tool: fish it full length in big water, trim to four inches for medium flows, and cut down to two or three inches for small, clear streams. One package of worms, effectively, becomes three different baits.
Mentioned in This Article
Mustad Addicted Fixed Balsa Float
Fixed balsa wood float with adjustable weight system and surgical tubing attachments, co-designed with Addicted Fishing
Reading the Water: Knowing Where to Cast
Rigging correctly is only half the equation. Equally important — arguably more so — is the ability to read a piece of river and identify where steelhead are likely to be holding. Both Jordan and Marlon approach this with a consistent philosophy: start shallow and close, then work progressively deeper and farther out.
Marlon describes his approach to a typical run: identify structure where fish might hold, make the first cast into the near-side water at a conservative depth, then methodically extend range and depth with each subsequent series of drifts. Running the same line two to four times before stepping downstream is a discipline that many eager anglers skip — and it costs them fish.
"I always try to start a little shallower, especially when you're fixed float fishing. You don't want to take your first cast through the hole and have that thing dragging instantly."
The fixed float excels in flat walking-speed runs with variable depth, while the sliding float shines in the boiling, fast-current water where precise depth control is non-negotiable. Learning to match the method to the water type is one of the most valuable skills a float angler can develop.
Line Management and Mending: The Difference Between a Drift and a Drag
If there is one technical skill that separates productive float anglers from frustrated ones, it is line management. A float that is being dragged downstream by a belly of line in the current is not fishing effectively — it's moving too fast, behaving unnaturally, and pushing the presentation away from where the fish are.
The solution is the mend. After a cast, the angler lifts the rod and repositions the line behind the float, eliminating downstream belly and allowing the float to resume a natural pace. Marlon walks through the mechanics: flip the bail, pick the line up with the rod, bring it behind the float, then let line feed off the spool with a finger on the blank to control speed. It sounds straightforward in description, but mastery comes only from hours on the water.
"The key thing when you're fixed float fishing is to make sure that you're using your rod motions, mending your line, and taking care of your line management enough to where your presentation is floating down the river flawlessly and looking as natural as possible to a steelhead," Marlon explains. "Envision this: here's your worm, it's floating down the river, and then you mend your line and it does something weird right in front of a steelhead. Chances are you're not going to trick him."
With the sliding float and a faster, deeper run, Jordan emphasizes the importance of keeping the rod elevated after the cast to hold as much line as possible off the water surface. The longer rod earns its keep here — an extra foot or two of reach means less line on the water and a cleaner, more controllable drift.
Mentioned in This Article
Gerber Pocket Knife
Gerber brand knife used streamside to cut fishing line and trim worms
Reading Your Float: Three Signs That Tell You Everything
One of the most practical pieces of advice in the entire tutorial comes from Jordan's breakdown of how to interpret float orientation. Whether you're fishing new water or returning to a familiar run, your float is constantly communicating the relationship between your rig and the river bottom — if you know how to read it.
Jordan outlines three float positions and what each one means:
Tilted upstream: Your presentation is riding too high in the water column. Either your depth setting is too shallow, your weight is insufficient for the current, or both. The downstream current is pulling the line faster than the weight can sink, keeping the bait elevated above the strike zone.
Perfectly vertical: This is the goal. A float standing straight up and down indicates that your weight is ticking along the bottom of the river at the same pace as the current, with your presentation drifting naturally through the strike zone. Adjust your depth and weight until this is consistently achievable.
Tilted downstream: You're too deep. The weight or the bait itself is catching on the bottom, slowing the rig and causing the float to lean in the direction of travel. Shorten your depth setting until the float comes back to vertical.
"Three tips for you guys: if it's pointing upriver, you're too shallow. If it's straight up and down, you're perfect. If it points downriver at all, you're too deep."
This simple diagnostic framework removes the guesswork from depth-setting and gives anglers a real-time feedback loop for dialing in any new piece of water. It's the kind of practical, field-tested knowledge that takes years to accumulate independently — and it's the reason experienced float anglers often outfish their companions in unfamiliar water.
Balancing Float Size and Weight: The Sensitivity Factor
A detail that many beginners overlook is the relationship between float size and presentation weight. A float that is dramatically over-buoyant for the weight below it will sit high in the water and resist going under on a strike — exactly the opposite of what you want. Proper calibration means choosing a float that the weight below just barely keeps afloat, so that any additional downward force — from a taking fish or from bottom contact — is immediately visible.
Jordan recommends matching the weight of your presentation to the float's rated capacity, or even slightly exceeding it. A half-ounce float paired with a jig and enough split shot to approach that rating will sit low and ride sensitive. The same float with a sixteenth-ounce jig will sit high and be nearly useless as a bite indicator.
This is where the Mustad Addicted fixed float's weight system genuinely earns its value — by allowing fine-tuned adjustments to the float's buoyancy rather than forcing anglers to swap floats entirely when they change jig weights.
Getting Out There: Final Thoughts on Float Fishing for Steelhead
Float fishing for steelhead rewards patience, attention to detail, and a willingness to put in time on the water developing feel for how a river communicates through a piece of balsa or foam. The technical elements — rigging, depth-setting, mending, reading float orientation — are learnable by anyone, and the fundamentals covered here will serve anglers on rivers from the Pacific Northwest to the Great Lakes tributaries and beyond.
Both Jordan and Marlon make the same essential point in different ways throughout this tutorial: start simple, fish close, observe carefully, and adjust. The angler who spends the first twenty casts methodically reading the water and calibrating depth will almost always outfish the one who guns for the far bank on cast one.
"It'll change your style of fishing and it'll create more and more opportunity for you in all different kinds of water, all over the world."
Whether you find yourself on a narrow coastal creek with a fixed float and a two-inch worm, or standing hip-deep in a heavy winter run with a sliding setup dialed to six feet, the principles remain the same: match the method to the water, keep your presentation in the zone, and watch that float like your fishing life depends on it. Because on the right day, in the right run, it absolutely does.